Beautiful Christmas Ornaments
Written 4th October 2024 | Subscribe to our Christmas newsletter
⭐🎅👇⭐👇🎅⭐
Buy 2026 Personalised Christmas Tree Ornaments here
⭐🎅☝️⭐☝️🎅⭐
Making felt Christmas ornaments is a fun and creative way to add a personal touch to your holiday decorations. They’re simple to make, customizable, and great for all ages. Here's a step-by-step guide to making your own felt ornaments:

Materials You’ll Need:
- Felt sheets (in various colors)
- Scissors
- Needle and embroidery thread (or sewing machine if preferred)
- Fabric glue (optional)
- Stuffing (cotton, polyester, or fabric scraps)
- Pencil or fabric chalk
- Paper (for templates)
- Pins (to hold the felt pieces together)
- Decorative items (buttons, beads, ribbons, sequins)
Step 1: Choose a Design
Start by deciding what shape or design you want for your ornament. Popular shapes include:
- Christmas trees
- Stars
- Snowmen
- Hearts
- Stockings
- Gingerbread men
You can find templates online or sketch out your own design on a piece of paper. Keep it simple for your first try, such as a basic star or Christmas tree.
Step 2: Create a Template
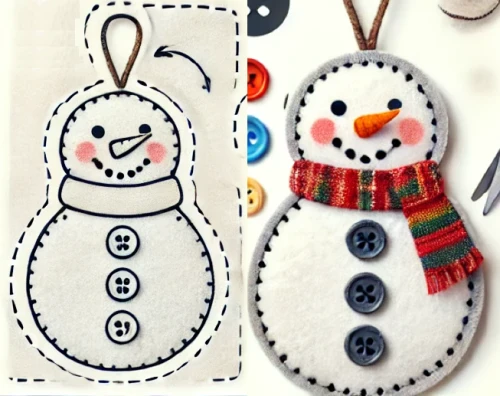
Once you've decided on a design, draw or print your template and cut it out. This will act as your guide for cutting the felt. You will want two pieces per ornament, one for the front and one for the back, to create a layered or stuffed look.
.webp)
Step 3: Cut Out the Felt
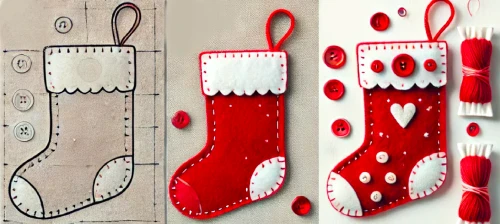
Take your template and pin it to your felt sheet to hold it in place. Use sharp scissors to carefully cut around the template. If your ornament has multiple colors or layers (like a Christmas tree with ornaments), cut each piece separately from the correct color of felt.
For example, if you're making a Christmas tree, cut a large green felt piece for the tree and smaller yellow, red, or blue felt circles for ornaments.
Step 4: Sew or Glue the Pieces Together
If your ornament consists of several smaller pieces (such as eyes, stars, or hearts), you’ll need to attach them to the larger felt base. Use embroidery thread and a needle to stitch them on with small, neat stitches for a handmade look, or use fabric glue for a quicker, no-sew option.
For example, if you're making a snowman, you could sew or glue on black buttons for eyes, an orange triangle for the nose, and a little scarf from a ribbon or piece of felt.

Step 5: Sew the Front and Back Together (If Using Two Layers)
Place the front and back pieces of your ornament together. Sew around the edges using a blanket stitch or running stitch. Leave a small gap open for stuffing.
If you prefer a flat ornament, you can simply sew the pieces together without adding any stuffing.

Step 6: Add Stuffing
For a 3D effect, lightly stuff the ornament with cotton or polyester stuffing. Use small bits at a time to ensure the stuffing is even. Once you’re happy with the fullness, sew the gap closed.

Step 7: Add a Hanging Loop
Cut a small piece of ribbon, embroidery thread, or twine (about 3-4 inches long) to create a hanging loop. Attach it to the top of your ornament by sewing it securely to the felt or gluing it between the layers at the top before you sew the pieces together.
Step 8: Decorate (Optional)
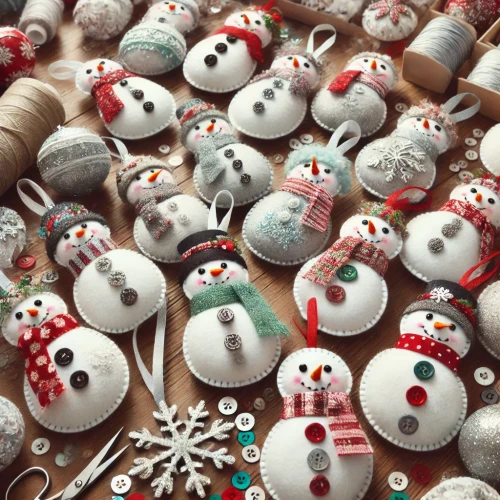
Now it’s time to get creative! Add extra details such as:
- Beads or sequins to create sparkle
- Embroidery to add detail or texture (like snowflakes or names)
- Ribbons for scarves, bows, or extra decoration
Use fabric glue or sew these details on as you like.

Step 9: Finish and Hang
Once you’re satisfied with your ornament, check that all seams are secure and that your decorations are in place. Your felt ornament is now ready to hang on the tree!

Additional Ideas:
- Make matching sets of ornaments by varying colors and sizes.
- Add personal touches, like embroidered initials or names, to give your ornaments as gifts.
- Create themed ornaments for different rooms or Christmas tree themes.
With a bit of creativity and personalization, felt Christmas ornaments can become wonderful keepsakes that you and your family will treasure for years to come!
Leave your comments here:










.webp)

