

How to make Grinch Fudge
Written 20th November 2023 | Subscribe to our Christmas newsletter
⭐🎅👇⭐👇🎅⭐
Buy 2026 Personalised Christmas Tree Ornaments here
⭐🎅☝️⭐☝️🎅⭐
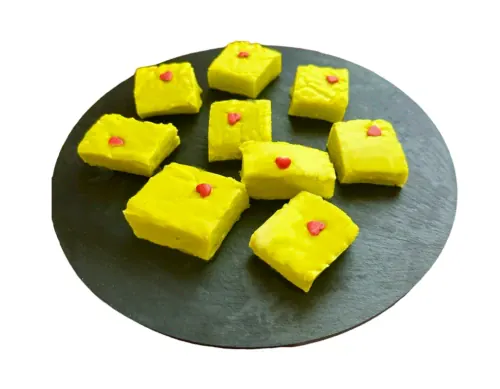
Grinch fudge is a delightful holiday treat inspired by the character from Dr. Seuss's classic tale, "How the Grinch Stole Christmas." This festive fudge is a colorful confection that captures the essence of the Grinch's mischievous spirit.
The fudge is tinted a vibrant shade of green, to resemble the Grinch's iconic hue, and adorned with red heart sprinkles or candy hearts to symbolize the Grinch's heartwarming transformation in the story.
Watch recipe video:
The fudge itself is rich and creamy, featuring a combination of white chocolate, sweetened condensed milk, and green food coloring. Grinch fudge has become a popular holiday treat, bringing a touch of Seussian fun and flavor to festive celebrations, making it a delightful addition to any Christmas dessert spread.
This vibrant fudge is sure to be a standout holiday delight. It requires no baking, uses just a handful of ingredients, and comes together quickly.
Ingredients
- 16oz of white chocolate
- 14 oz of sweetened condensed milk (1 can)
- 15g Butter (1 tablespoon)
- Pinch to salt
- 8 drops of green food colouring (Lime green)
- Edible Heart sprinkles (optional)
Materials
Method
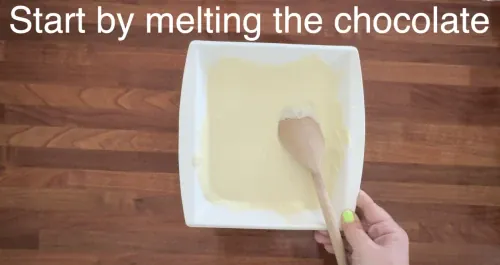
- Melt the chocolate
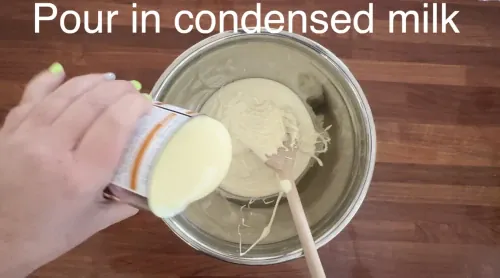
- Pour in condensed milk
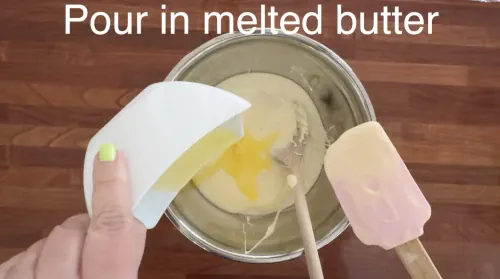
- Pour in melted butter
- Mix together and add a pinch of salt
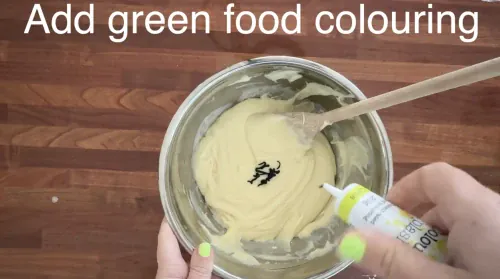
- Add green food colouring until the desired colour
- Mix again until the consistency is thick and it is getting really hard to mix.
- Transfer into the Silicone Square Cake Pan - 8 inch
- Add the hearts
- Leave to set in a fridge for a minimum of 3 hours, leave overnight if possible.
- Cut into the desired size and enjoy!
.webp)
Let's make Grinch Fudge

1. Melt the chocolate in the microwave.
Melt for 30 seconds and then stir using a wooden spoon, keep repeating until the chocolate is fully melted. Remember to stir the chocolate at the bottom of the bowl as this can get easily burnt.
2. Pour in condensed milk
Pour in the can of condensed milk - around 14 oz. Use a spatula to get all the contents out of the can.
3. Pour in melted butter
Melt the 15g (1 tablespoon) butter in the microwave, it should only take around 20 seconds to melt depending on the temperature of your microwave.
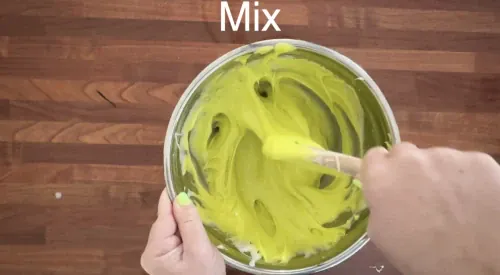
4. Mix together
Mix all melted ingredients together using a wooden spoon.
Whilst mixing add a pinch of salt

5. Add green food colouring until the desired colour.
If you're concerned about the fudge appearing excessively green, start by adding only 5 drops of coloring, as you can add more later if needed.
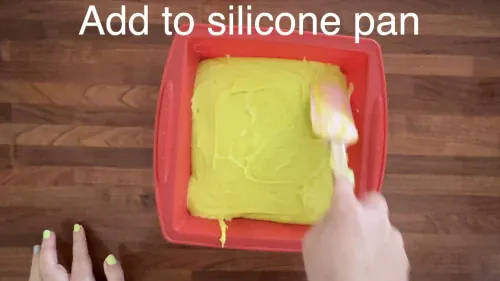
7. Transfer to Silicone Square Cake Pan - 8 inch
Once the mixture is starting to get too difficult to stir, transfer it into the Silicone Square Cake Pan - 8 inch
Use a spatula to get every bit of fudge off the bowl.
Make sure the fudge is smooth along the top using the spatula.
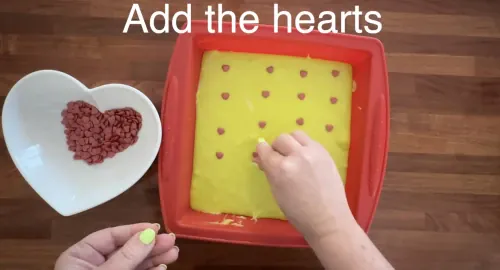
8. Add the edible hearts
Add the hearts, it is up to you how many hearts you wish to add and the patterns you would like.
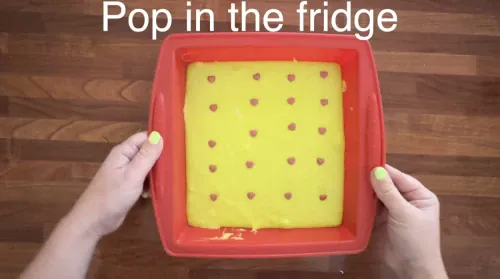
9. Leave to set in a fridge for a minimum of 3 hours. For the fudge to fully set it is best to leave overnight.
10. Cut into the desired size and enjoy!
Leave your comments here:


.webp)


.webp)