
A step-by-step guide on how to create a Paper Plate Santa using simple materials:
Written 4th October 2024 | Subscribe to our Christmas newsletter
Materials Needed:
- White paper plate
- Red construction paper
- Cotton balls
- Googly eyes
- Glue
- Black marker
- Scissors
.webp)
Steps:
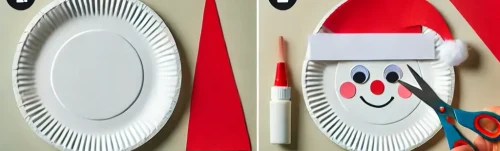
1. Prepare the Paper Plate
Start with a plain white paper plate. This will serve as the base of Santa's face.
2. Make the Santa Hat
- Cut a triangle shape out of the red construction paper to form Santa’s hat. Make sure it’s large enough to cover the top third of the paper plate.
- Glue the red construction paper triangle to the top of the plate, as if Santa is wearing the hat.
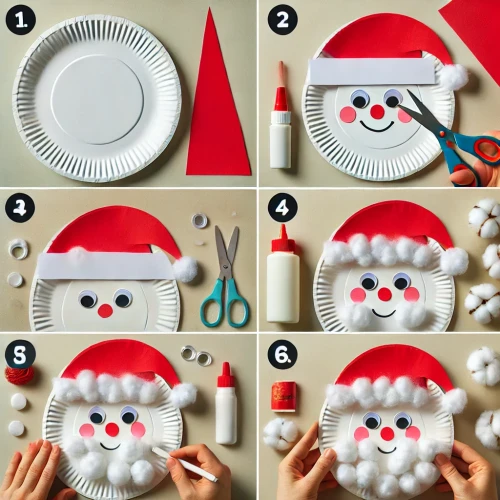
3. Add the Hat Trim and Pom-Pom
- Take a cotton ball, stretch it slightly to make it fluffier, and glue it along the bottom edge of the hat for the trim.
- Glue another cotton ball at the tip of the hat to create the pom-pom.
4. Create Santa's Beard and Mustache
- Glue cotton balls around the lower half of the plate to form Santa’s beard. Make sure to cover the edge of the plate for a fuller beard.
- For the mustache, take two cotton balls, slightly stretch them, and glue them above the beard, just below where the mouth will be.
5. Add the Eyes
- Glue two googly eyes onto the plate, in the space just above the cotton ball mustache.
6. Draw the Face
- Using the black marker, draw Santa’s nose and a smiling mouth between the mustache and beard. You can make the nose small and round.
7. Let it Dry
- Allow all the glued pieces to dry before handling the Santa craft. Once dry, your Paper Plate Santa is complete!
.webp)